First let me know that should you choose to utilize this little trick you do so at YOUR OWN RISK (using supplies that do not come with the vacuum such as this may void the warranty) and I will explain the perils after explaining what I’ve done and the process used.
So as much as I hate to admit it even a maven can lose the ring gasket while cleaning out the bin on the cordless vacuum. I was in a hurry and then all of a sudden I thought I broke the vacuum because it just didn’t suck as much as it used to ![]()
So in my quest to find a replacement I had a thought.
In my garage I had some supplies for making screens for windows. The rubber spline used for holding the screen in the frame was oddly enough by my memory very close to the same size as the gasket needed to make the seal for the dustbin on the vacuum. I had already tried making a silicone gasket which worked but was not the best material I thought as I can no longer easily open the bin using the lever release. I did notice the rubber spline material that I used in this is not as pliable and soft as the original gasket, I was worried that would cause issues but so far it hasn’t for me, over time it may weaken the latch system that locks the lid in place when it’s closed which is one of my main concerns as far as possible issues with this hack.
So I measured the outer diameter of the lid to the dustbin. It is this area (red mark) all the way around where the gasket sits and you want to have the precise fit if you use this method. Remember, cut longer and trim down as needed until you get it end on the spline. Have you got too short you got to start all over again ![]()

So I did use small dabs spaced sporadically throughout to hold the new “gasket” in place. I spaced it approximately an inch and a half between places to glue. You don’t want to glue every single area because you do want it to move a little bit and just in the unforeseen circumstance that you may have to remove it or replace it at some point.

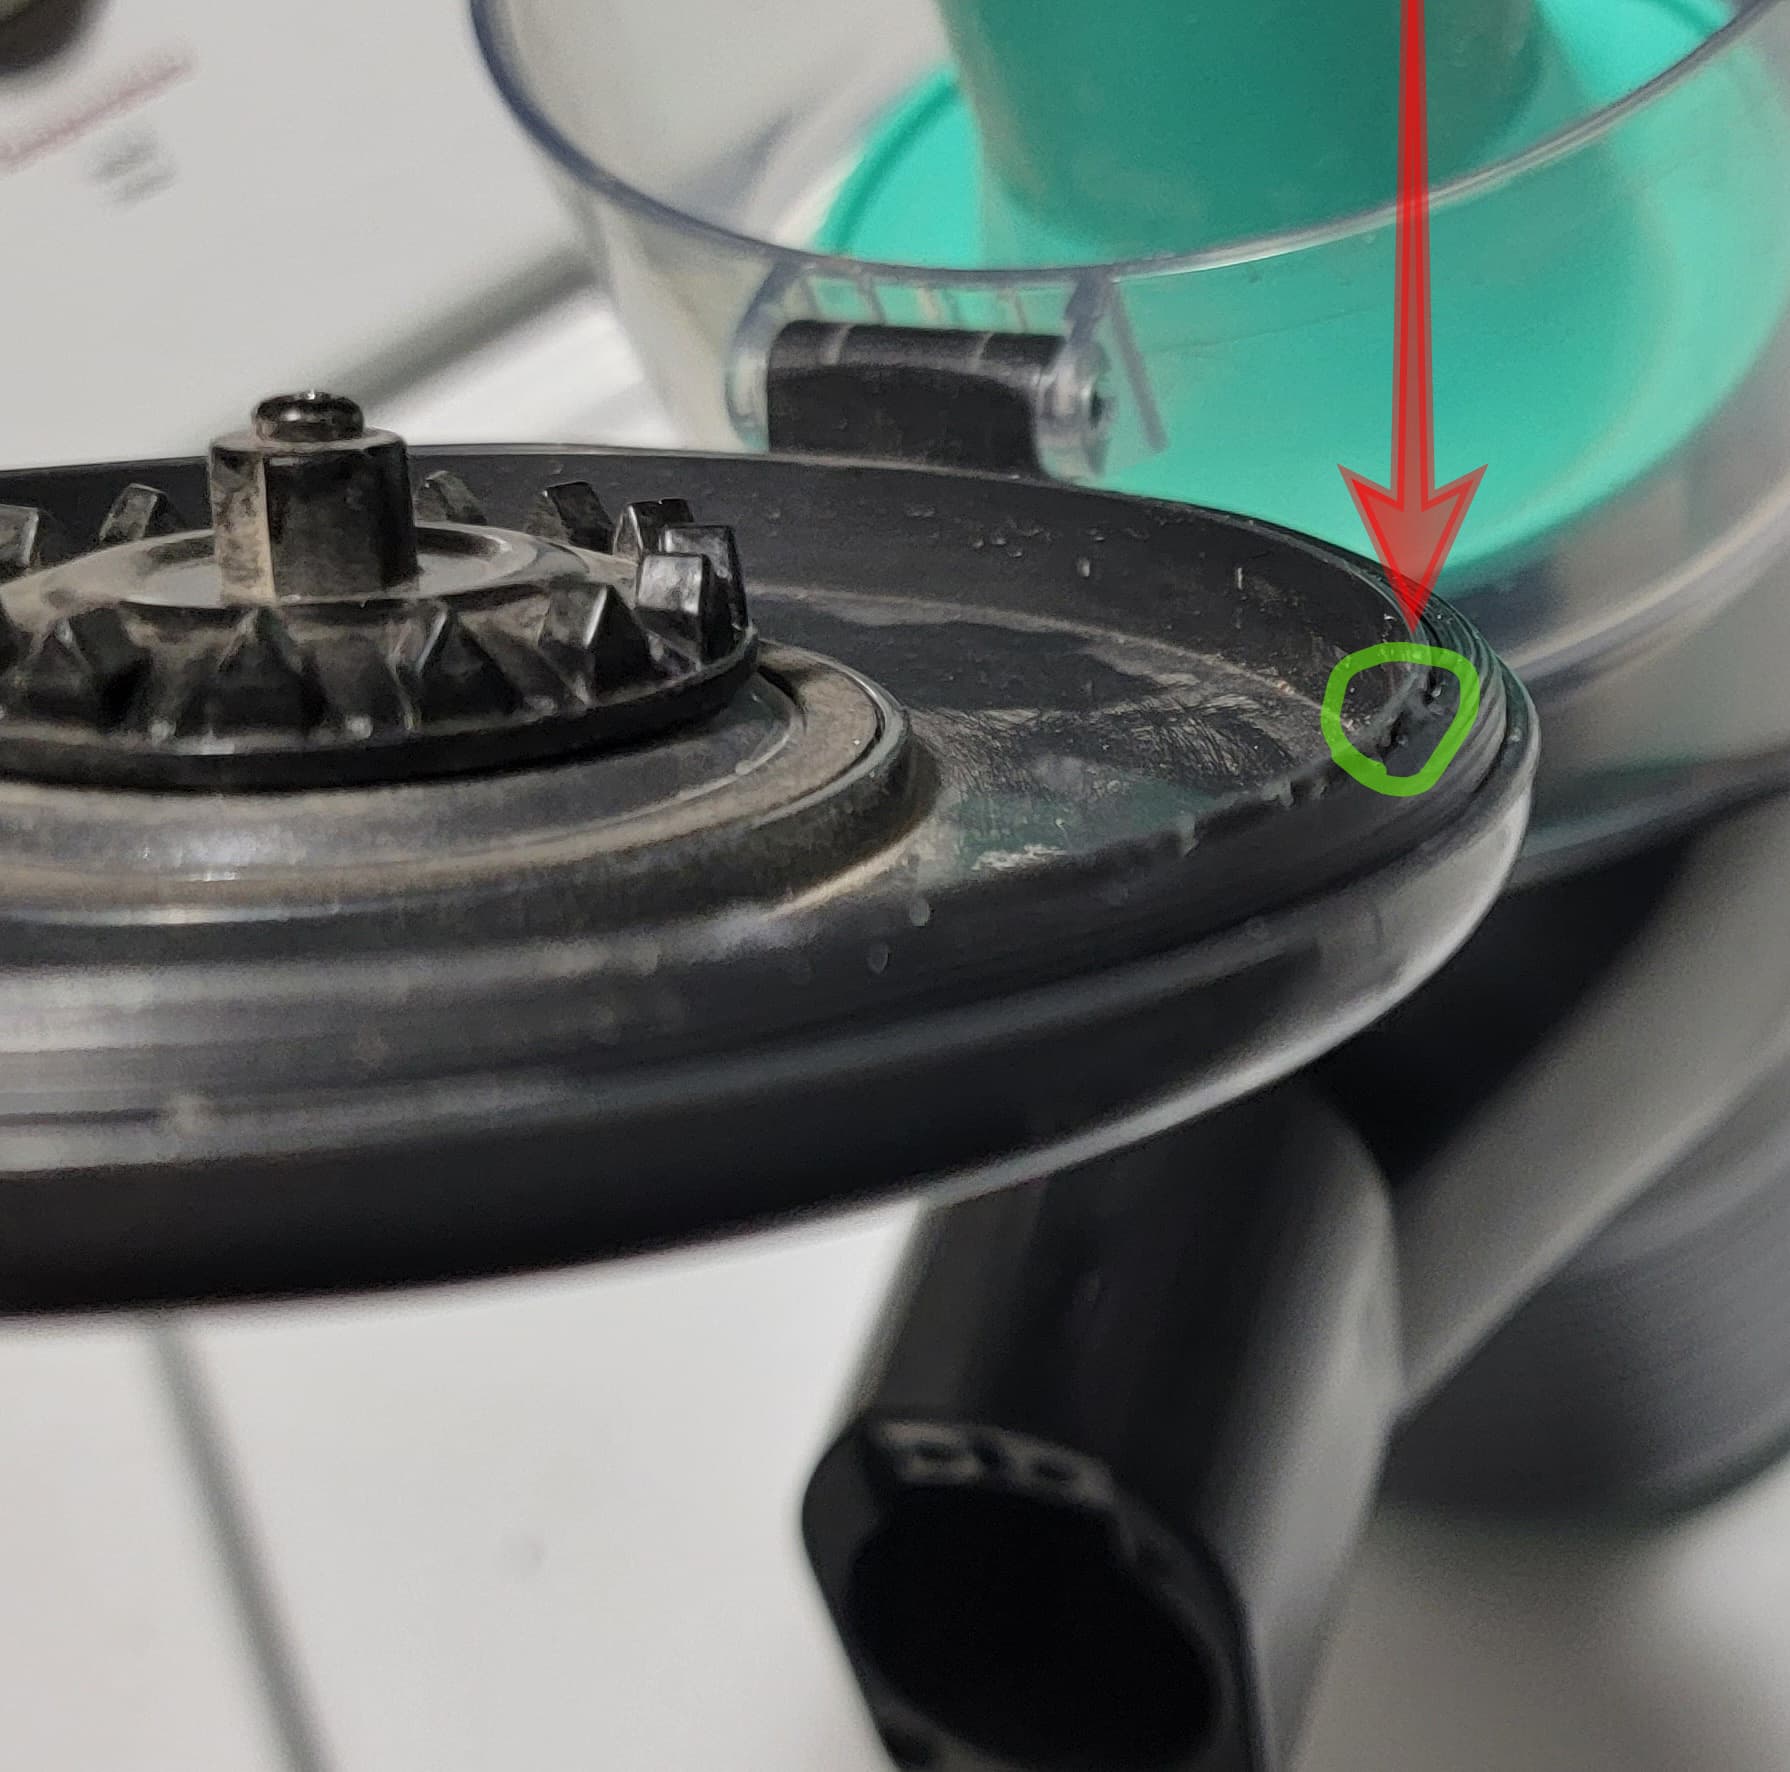
Notice here that you can see the dab of glue that I put in, it is attached to the inner part of the new improvised gasket and it is glued to the vertical wall.
Give the glue the appropriate time to cure and so far this has worked for me.
Again this is not approved by Wyze in any capacity and could possibly void a warranty should it cause damage in some way.
But so far this is working great for me and I don’t have to struggle to go out and find the appropriate sized o-ring and it only cost me a couple of dollars ![]()
If you have any questions feel free to tag me and I’ll do my best to answer them when I see them, hope this helps someone else.