Hello, People.
Earlier, I submitted a post about modifying the sending unit of a contact sensor by moving its reed switch to an external one. The modified reed switch is inserted into a small hole drilled into a wall of a door frame to be activated by a magnetized deadbolt. This earlier version was very time-consuming to build. This post describes how to use a 3D printed holder to reduce much of the tedious work. The 3D print was obtained from lachlan6 through Esty, it is called “Wyze Doorlock Bracket”. Below is a link to my STL file, no charge:
Contact Sending Unit Enclosure 102-20.stl
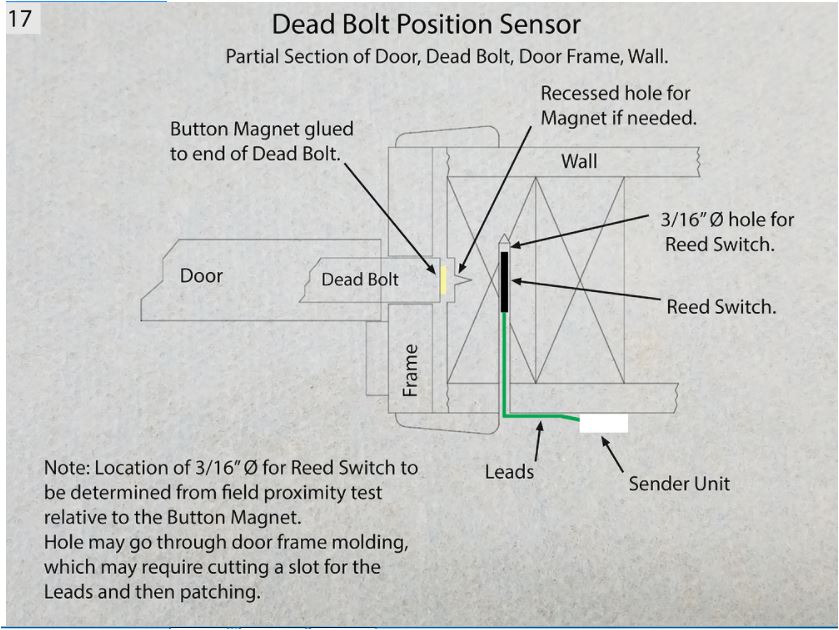
This first photo below shows the general object of this approach.
This first group of pictures shows start preparations. In picture one I had the holder printed through Esty.com. This was before I knew about free library printing. The free link above is for the holder shown here.

These four pictures show the removal of the circuit board and drilling the wire exit slot.

These four pictures show circuit board work and placement of the reed switch at end of the leads,

These last four pictures show the finishing work.

Victor Maletic.